Build the “Laser Messiah I” with O.M.G. -a design so easy ANYONE can make it!!! [Steps 4-6]
This is the second part of the first step of building the WORLD RENOWN "Laser Messiah I"! This is a full-coverage PROFESSIONAL STRENGTH laser helmet / LLLT Device --and I teach you how to build it yourself!!! This helmet CHANGED THE WORLD!
This is the second part of the first step of building the WORLD RENOWN "Laser Messiah I"! This is a full-coverage PROFESSIONAL STRENGTH laser helmet / LLLT Device --and I teach you how to build it yourself!!! This helmet CHANGED THE WORLD!
"Part2"... Steps 3 to 6!
"Part 2" Table of Contents:
• Step 4 - Making the diode holes in the top!
• Step 5 - Adding the Brush Bristles!
• Step 6 - Completing the Helmet!

August 2nd, 2008: Step 4 - Making the diode holes in the top!
Ok, only two main parts of this step... MARKING the diode holes and MAKING the diode holes! Sounds easy, right? Yeah, easy... but it's LOOOOONG because you have to make hundreds of holes (well, you don't HAVE TO, but I think a device with the most options is better)! But you've got to do it in pretty much every helmet design out there so it's not like you wouldn't have to in most other designs.
This step is where the Tandy "Maxi Punch" leather hole punch set comes in that you can but in Michael's for about ten bucks. You can use a power drill, but if you do, you need to use a "spade" drill bit. Look... this is FOAM we are using, so you are running a big risk of tearing it with a drill, so I am completely trying to dissuade you from using that and using a whole punch instead!
Also, if you want to, you can just mark and punch holes in the areas that you think you'll need them, however I wanted to make one with the most options possible. You're on your own -don't even ask me- in figuring out how to do that apart from the method I spell out on my website on how to determine your ballpark coverage area!
Finally, just a reminder, this is the size necessary to fit the diodes I use -the AiXiZ 5mm/650 nm ones I have on my site. If you get another brand, you'll have to see what their dimensions are and experiment a bit!
Ok, let's get going, baby...
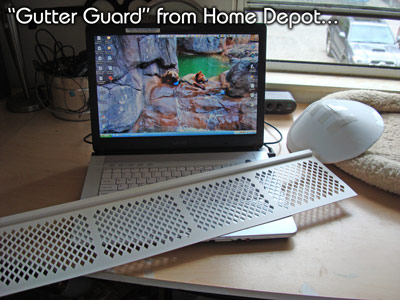
1) Get you "Gutter Guard". If you don't have "Gutter Guard" you can download my printout that I made of it on my site and use that.
Some quick notes about this, I use the wider orientation as the "front". It's because the vertical spacing is slightly closer than the horizontal spacing when the "Gutter Guard" is oriented this way, and this is a little bit better for our scalp when you factor in the curvature, etc.
Also, the gutter guard is simply "good" for our purposes. It's certainly not perfect, but it's gives decent spacing to allow for decent coverage with diffused diodes at our ~2cm height. Yes, there will be some gaps in the coverage, but yes... it's good enough! So, for the record, it is NOT the "be all, end all" standard for diodes... it's just something that works. If you want to try something else -or just eyeball the diode spacing- that's up to you and it could be vastly superior or horribly worse than ours, and I have no idea how to gauge that! Got it? Good!
2) Cut the "Gutter Guard" into two pieces, a big piece (I just made it a full section of it) and a small piece...
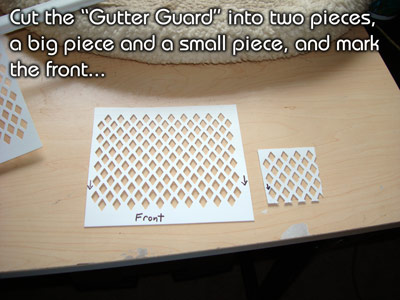
...and mark what we consider the "front" -the end you will always point towards the front of the helmet- on both of them. I just simply put an arrow on the smaller one.
3) It's time to make dots! And don't worry about it... go ahead and get it in your head that this is NOT going to be perfect! lol...
By the way, I've mentioned this before, but there is a reason that we didn't go ahead and make the dots and holes before we glued it, and it's because 1) we'd lose diode holes around the seams, and 2) the diode holes could possible bend when we formed the dome shape, causing the diodes not to want to point straight down (as well as adding to warpage).
Ok, the glued seam is the center mark of our helmet. We are going to hold up the bigger piece of "gutter guard" over this and make marks directly up the center ridge! These dots up the center will serve as a reference to make all of our other dots from!
Now, first of all, (and you'll have to look at the picture here for clarification because I don't really know how to word this), but on the actual gutter guard, you can choose the middle to be on the first row or the second row. Like I said you'll have to look at the picture, but I chose the SECOND ROW because I liked the way it would make the diodes look on the first row...
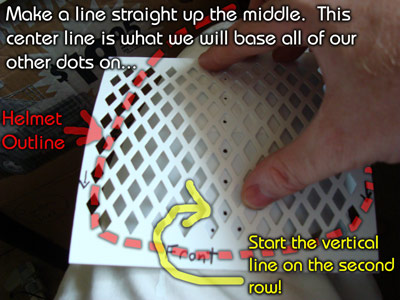
So make tiny dots with the tip of your permanent marker. Obviously, the diode holes are going to be much bigger, but we just want to mark the center point of each mesh "diamond" so we will know where to put the hole. Oh, I'm sorry if you still don't understand what I'm talking about with that whole "use the second row for the center" thing after you've seen that picture, but I can't do EVERYTHING for you! Look at it again and figure it out!
Also, make sure you don't put the dots too close to the bottom rim!!! If you can see the edge through the "diamond" shape, then you probably are too close! Here is a shot of with the "gutter guard" removed o what I just did...

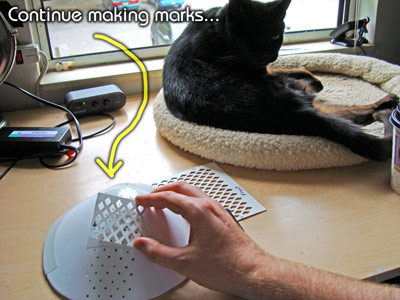
Ok, continue making the marks up the entire glued seam:
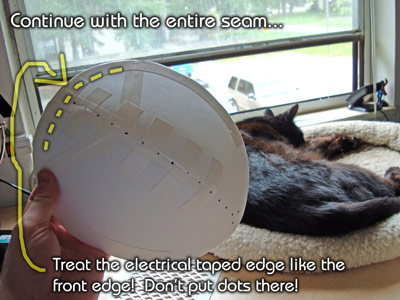
...and stay away from the electrical tape around the edge! We treat that like it's the edge of the helmet, and we aren't going to put dots or holes there (the padding is going to be under that).
Yeah, it's tricky to get the hang of bending the "Gutter Guard"! ...and now you know why we cut the smaller piece!
4) Put dot's everywhere using the small "Gutter Guard" piece, using the center as a reference point...
Look, you aren't going to get this perfect! ...But do your best and stay away from the edge (including the electrical tape on the edge)!
In fact, you'll more than likely be faced with situations like this...
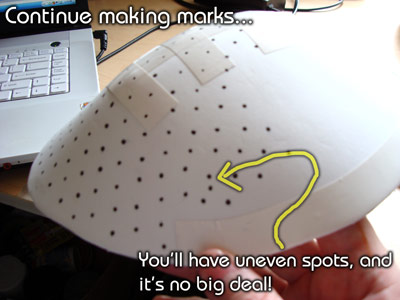
...when you pull up the "gutter guard" and you have dot's right next to each other! lol... So what?? When it comes time to make the holes, just pick which one is best, or put it in the middle of the two!
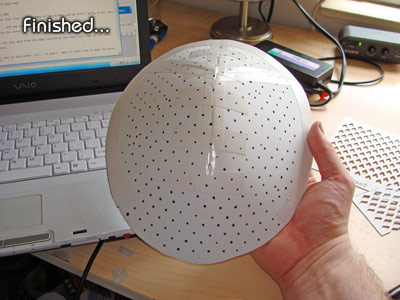
Here is what it looks like when you are finished:
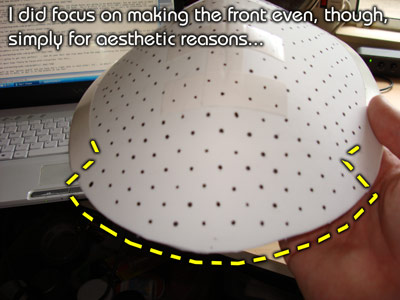
...And look, I have a CRAPLOAD of areas that have, ummm... let's say "less than uniform" dots! Lol...
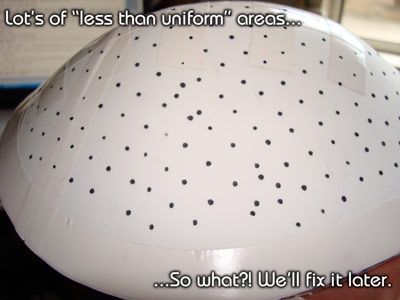
However, I will say that I took the time to make it even in the front. That's the area you'll be able to see the most, and, well... I just wanted it even there...
5) Time to start making holes! Like I said, I recommend against using drill bits because of the risk of tearing the foam (although spade drill bits seem to be the best for this). The reason hole punches are good is because they actually remove the foam, and don't just rip it or whatever. The problem is with this laser helmet stuff -as all experienced builders know- there is a "warp factor" when you stick the diodes in so close to each other. This helmet has some defenses against that, and one of them is using the Tandy "Maxi Punch" set.
What's really good about this set is that it has three sizes that can be good for other projects with diodes that we may do... 1/4" (a good size for just inserting the threaded tip of the diode in the material), 17/64" (a great size to snuggly fit the entire diode, and what we are using for this project), and 5/16" (the size for the entire diode if for some reason 17/64" is too snug).
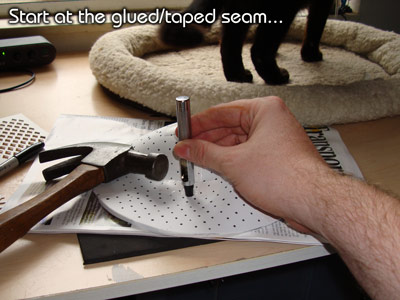
Ok, so grab your hammer and assemble the hole punch with the 17/64" bit! I started at the top, right on the seam...
Obviously, I can't take very illustrative pictures because I'm lacking a third arm to hold the camera, but you get it! lol... Here is the finished ridge:
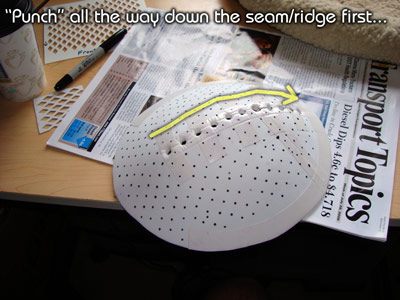
The reason doing the seam/ridge first is because -since you have to press down on the top so much- doing this ridge section puts THE MOST STRAIN on the helmet! Yes, it will resist it an come out ok, but the chances it WON'T resist this are minimized when the rest of the helmet is still solid! Also, yes, it is MUCH HARDER to use the whole punch on the taped sections. Once you finish with those, you will be moving like greased lightning!
Oh, I put a piece of scrap foam and newspaper (and decided I didn't need the newspaper later) under the helmet because I think the hole punch may stay sharper if it's not being bashed directly into a hard surface .
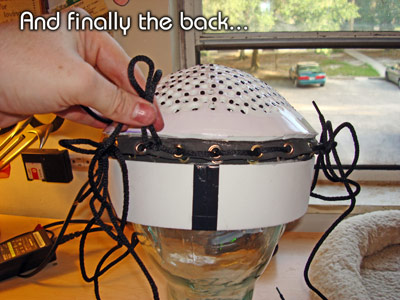
6) Continue "building out" from the center seam/ridge...
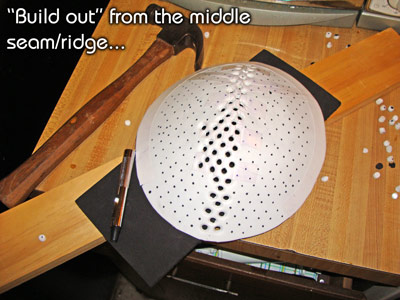
...and the electrical taped areas are the hardest anyway so it's good to go ahead and get those first!
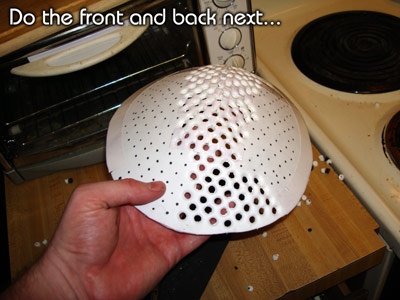
7) After you have done a decent amount from the middle ridge, I think it's probably best to go to the front and then the back...
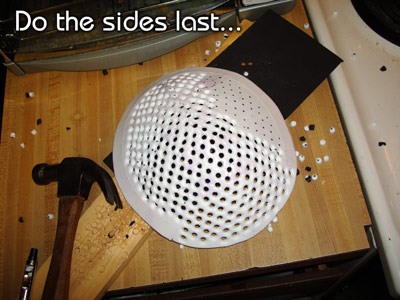
8) The sides are the least important, so it's best to do our "creative punching" to compensate for our not-so-perfect dot marks on the least important areas! So save those for last...
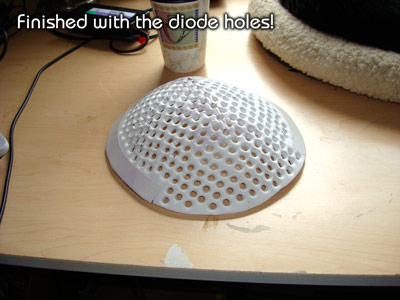
ALLLLLMOST THERE...
...And you are done with the holes!
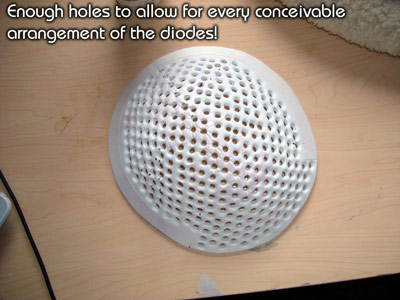
Yes... this is more diode holes than you will probably ever need, but you have every conceivable placement option available to you now!
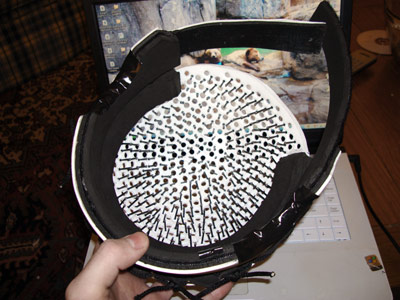
Here's the view from the bottom...
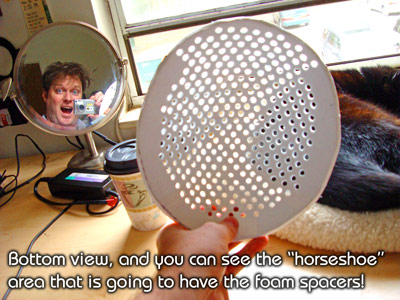
...and you can see where the foam spacers are going to go!
Ok, that's it for this step! Next step we add the brush bristles and the foam supports, and then the last step is adding the eyelets so we can fasten the two parts together! So yes... we are almost finished with the entire helmet!
-O.M.G.
Step 5 - Adding the Brush Bristles!
In this step, we are only going to put in the brush bristles, which obviously serve the purpose of keeping the diodes a uniform distance off of the scalp. It's simple to do, but it can be a little time consuming. Therefore, we are going to save gluing the foam spacers on, making the eyelets, and connecting the two helmet parts for another step! However, even if it *is* time consuming to do this step, remember this very important rule:
YOU ONLY HAVE TO MAKE IT ONCE! lol...
This step will require probably two paddle brushes and a thin nail about the thickness of the brush bristles. NOTE: If you use a nail slightly THINNER than the bristles, it may be more secure but it's a pain in the ass to push hundreds of bristles in through that small of a hole. If you use one slightly THICKER than the bristles, it's much easier to push the bristles in, but it's going to be slightly less secure. It's up to you, and you may want to test one of each! I ended up using a nail that was slightly THICKER.
Here is the type of paddle brush I used:
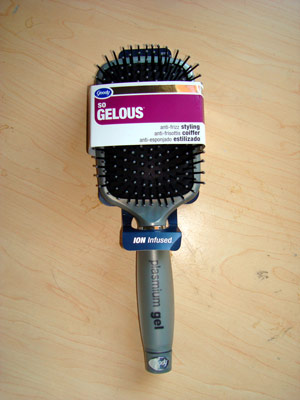
It's the Goody "So Gelous". I don't have a clue if other brands of brushes' bristles will work better/worse/whatever, but these worked fine, and I'm assuming they are all pretty much the same thing. Just make sure the bristles are standard plastic paddle brush bristle size... roughly 2cm!
Ok, let's do this...
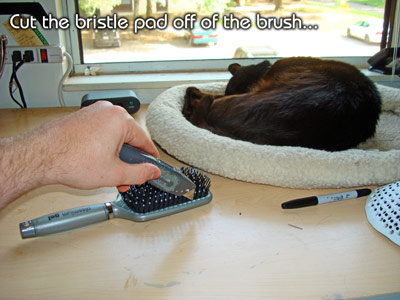
1) Carefully cut the pad off of the paddle brush (and I borrowed this picture from my original laser brush instructions because I've already removed the pad and I can't find the handle anymore):
2) Remove the bristles from the pad:
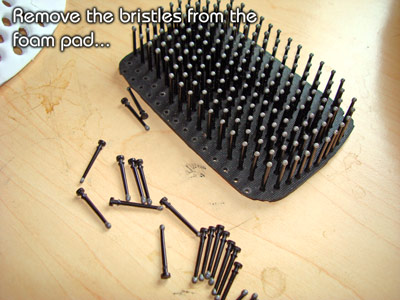
Just push hard and they will pop right out the back. Also, notice the bristles have an edge on them that secured them to the rubber pad:
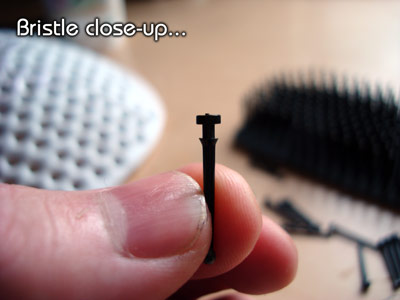
Obviously, our foam *was* thicker than the rubber pad, but you will find that in the areas that we smashed the foam into oblivion by punching holes, the edge will indeed come out the bottom and secure the bristle to the foam good enough for our purposes! that's not likely if you use a small, thin nail). If it *doesn't* go all the way through to the bottom -as it does in the areas with electrical tape- it will still be secure enough (and if not... you can put one drop of super glue on it although I never had to).
3) Make holes with the small nail in between the diode holes and push in the bristles...
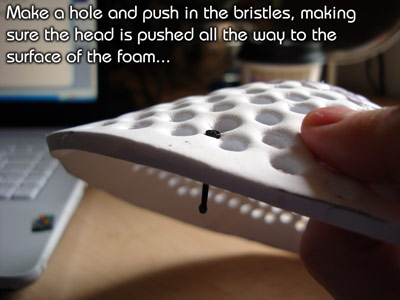
Make sure you press them all the way in, so the head of the bristle is touching the surface, and take the time to get that bristle edge through the bottom...
By the way, I started my bristles in between the first and second rows.
Obviously, because our diode holes are often placed "creatively" and less-than-uniform, there will be a few areas that we can't fit a bristle. So what?! lol... It'll be fine! There will be plenty of bristles.
Also, you don't have to put them right next to the electrical tape rim along the side. This is because the foam spacer is actually going to be slightly TALLER than the bristles, so the bristles right there probably wouldn't even be touching your scalp.
One brush got me a little further than 3/5ths through (maybe actually even more like 5/7ths), and here is what it looks like so far from the top...
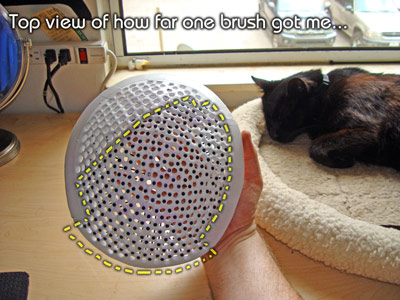
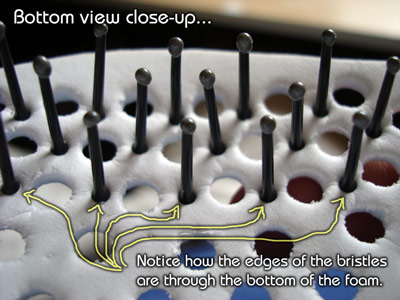
...and on the bottom:

Note that in the bottom, some of the bristles are pointing in to each other or slightly in random directions. That's ok, too! We are going for the "big picture" here, and besides... of course some of the bristles are going to be pointing into each other -it's a concavely curved surface!
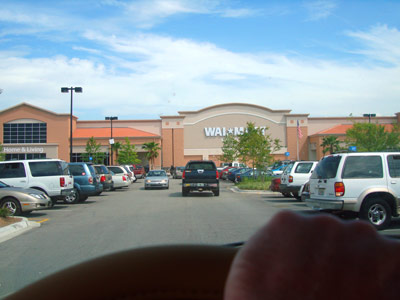
Here is me going to Wal-Mart when I realized that only one brush wasn't going to have enough bristles to do the job...
And here is the brush that I saw that really pissed me off...
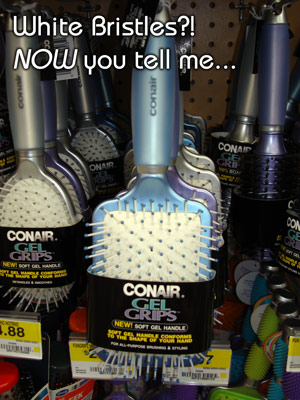
I could have used WHITE BRISTLES! lol... Hey, in my defense, I bought that brush over 7 months ago when I made my fist helmet!
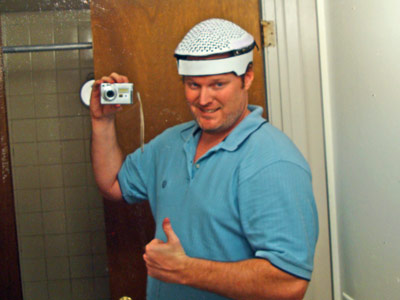
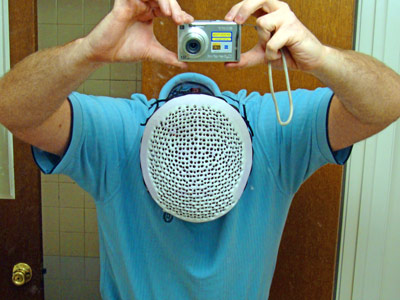
TA-DA!!! You're finished...

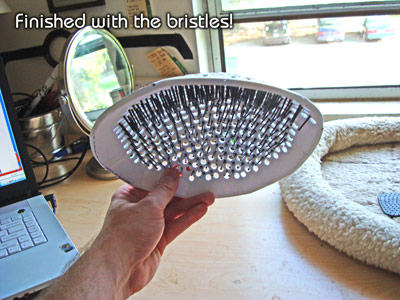
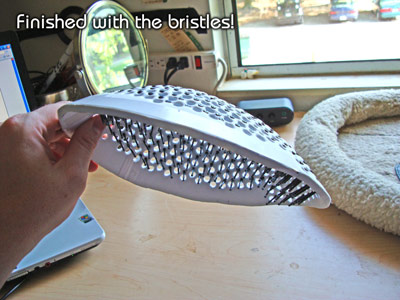
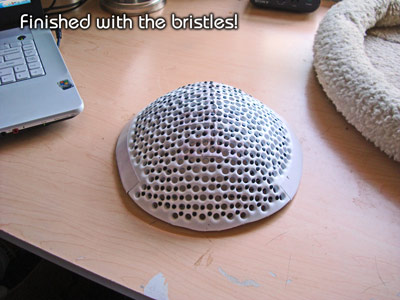
And MAN, it really conforms to your head very well...
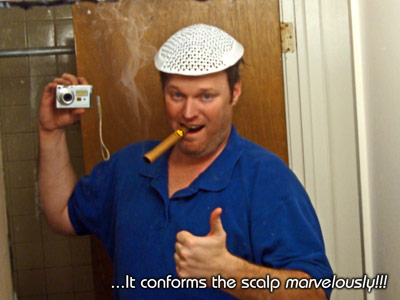

Of course, we BUILT IT THAT WAY, so that's no surprise! Here's how many bristles I used if you are curious...
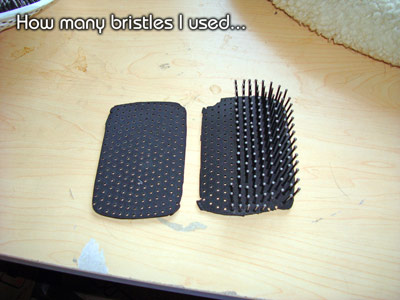
That's it for this step! The next step we finish everything involved in the pre-wiring stage, and the hardest part -the helmet- will be complete!
-O.M.G.
August 6th, 2008 - Step 6: Completing the Helmet!
In this step, we finish the "Laser Messiah" helmet! Let me tell you... it is EXTREMELY SOLID! When the pieces are together, they support each other and it's every bit as supportive as a hard shell, store bought helmet... but with all the benefits of a custom fit, cheap cost, and everything else we've spelled out!

Yep...
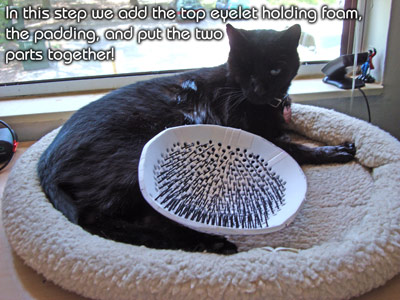
...my cat was there for this last step, too. DEAL WITH IT!!! lol...
You will need one sheet of 3mm foam and three sheets of 6mm foam -one for each layer- the one or two eyelet sets from Wal-Mart, and shoe laces. Ok, Let's finish this thing!
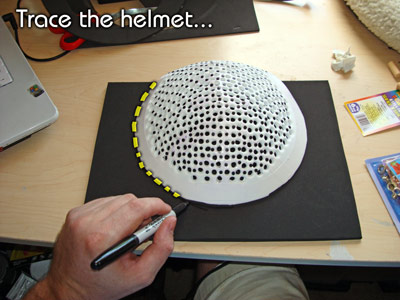
1) This is for cutting the top eyelet holding foam, so it requires the 3mm black. Unfortunately with this step, you can't just cut a strip and conform it to the bottom due to the shape of your helmet, so you have to cut it in a pattern that mimics the helmet!
Put the top part of the helmet on the 3mm black foam, lined up at the start of the electric tape on each side:
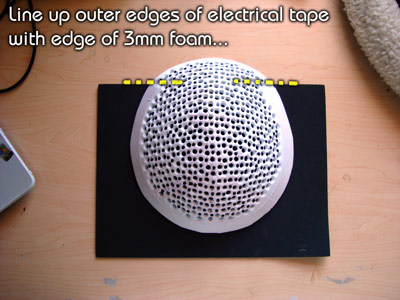
Then draw a line with a HALF INCH SPACE around the helmet...
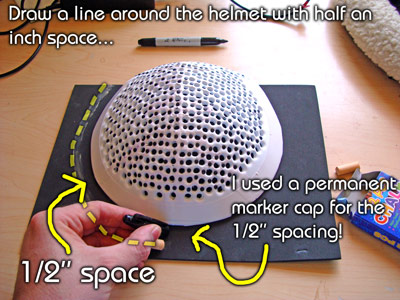
I used the permanent marker cap as a "spacer" because it's about half an inch! Also, I tried to use chalk here because I thought it might show up a little better in the picture, but it didn't really. I used permanent marker after this (and yes, it shows up on the black!).
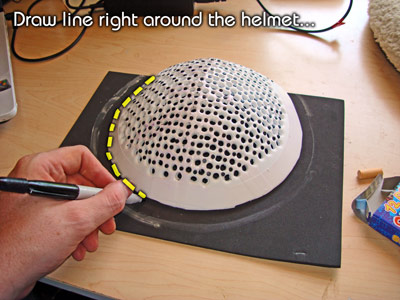
Then, on the same piece of 3mm foam, draw an line right around the helmet (no space):
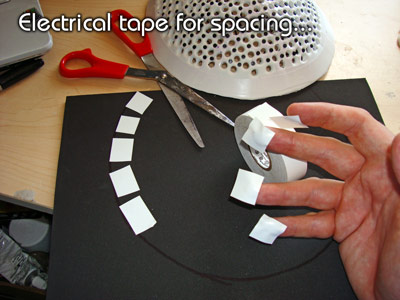
Ok, remember we want the foam to be the width of the electrical tape under the top (that's why we put the top electrical tape rim and didn't put diode holes or brush bristles there), so I thought that the best way to do this was to actually use temporary pieces of electrical tape to mark that width...
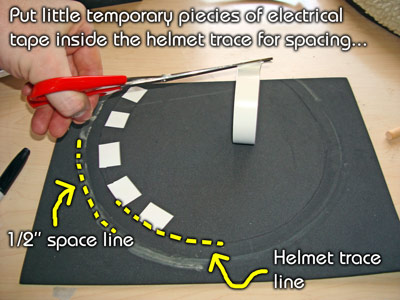
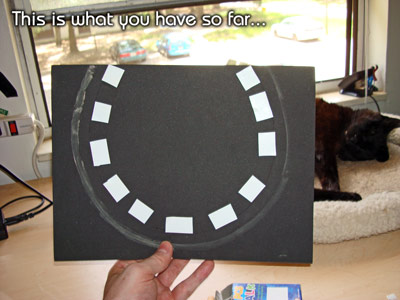
Don't press hard on them because you *will* remove them! This is what you have after you do this step (remember, the chalk was just an attempt to show you guys what I was doing a little better):
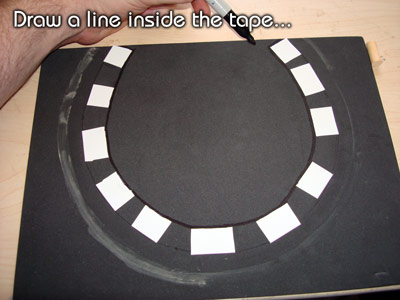
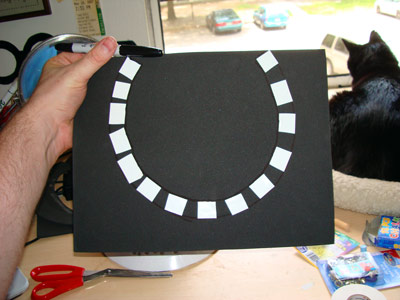
Make a line with your permanent marker around the inside of the tape:
Grab your scissors and cut out the inside...
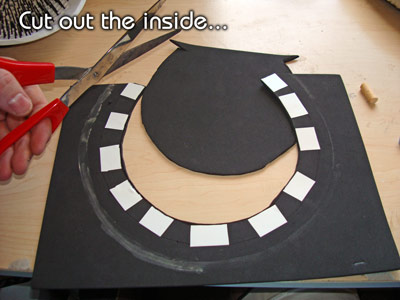
...And then cut out the outside:
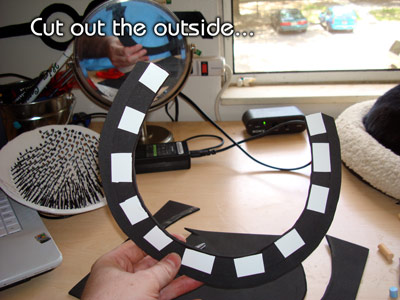
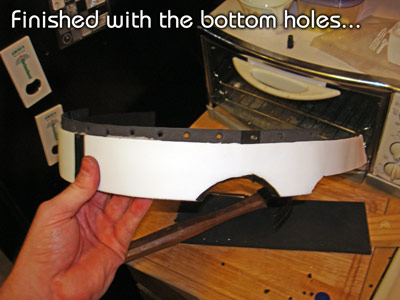
Peel off the tape, and you are left with this:
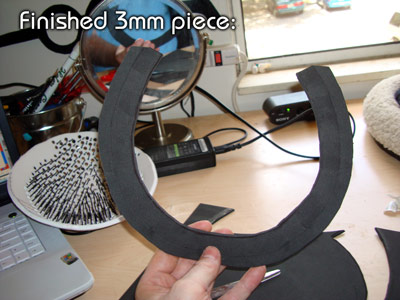
You can see that it will fit in the inside of the helmet (BUT DON'T GLUE IT YET!!!)...
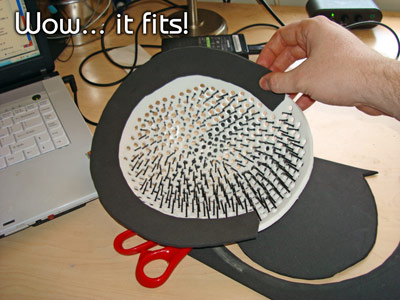
You are through with the top eyelet holder!
2) Now is the time for the three foam spacers, using the three sheets of 6mm foam! THREE?! Why do you want to use three? Simple... we want the foam padding to be TALLER than the bristles because we want as much weight as possible from the future diodes to shift OFF OF THE BRISTLES and on to the foam padding! Trust me, we need this!
Ok, this step is very similar to what we just did, but we don't need a 1/2" spacer! So, we start by putting the helmet on the 6mm foam and aligning the electrical tape of the helmet to the edge of the foam:
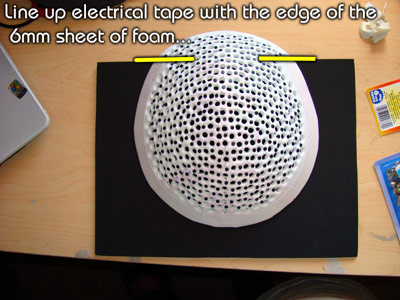
Trace the helmet on the sheet with the foam marker:
Then do the same electrical tape trick that we did before:
And you have this:
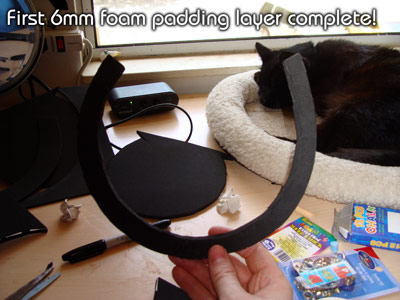
So cut the inside...

...And the outside, and you are finished with the first 6mm foam padding layer!
Ok, now that you have one complete, save some time and just use the finished first 6mm foam padding layer to trace the other two directly on the other 6mm sheets:
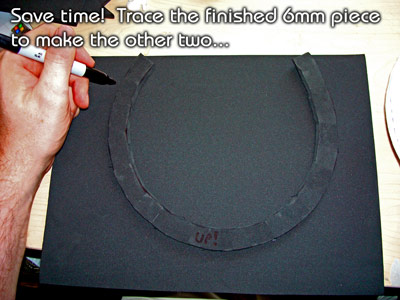
If you notice, I wrote "UP!" on all the pieces just to make sure (and that's the side I'm going to put the glue on, too!).
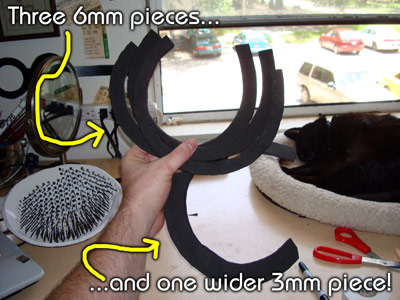
So, do all of that twice so you now have a final total of one wider 3mm piece and three 6mm pieces!
3) Now... we GLUE THEM ON!
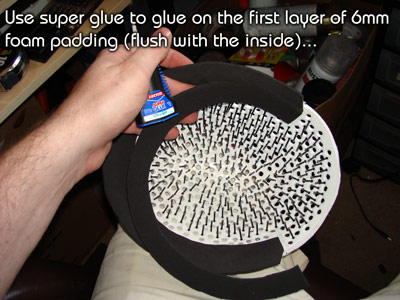
For the first layer, it is EXTREMELY IMPORTANT that you make sure you have at least a 1/2" hanging out for the eyelets. Therefore, I used the slower drying glue -even though it was a pain- just so I could "play around" with the location (if think you are good at this, then you can go straight to the Super Glue Gel!).
So, put the glue on the wider 3mm layer (on the side with the markings, and on the inside part where the electrical tape was)...
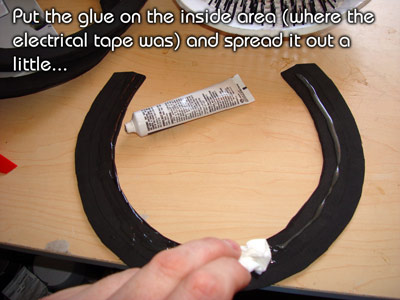
...And if you are using the slower drying glue like I was, you will want to let it get a little tacky first before you glue it, so let it sit for a few minutes! THEN press it on, BEING VERY SURE TO GIVE YOURSELF ENOUGH SPACE FOR THE EYELETS! I can't stress enough how important that is! lol...
When you are finished, trim up the ends if necessary...
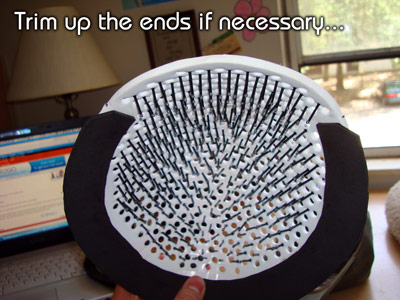
...And make sure, once again, that you have enough room for the eyelets:
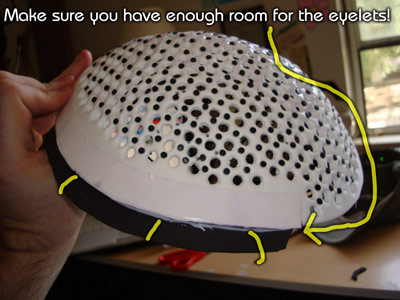
Glue the first layer on with the Super Glue Gel (flush with the inside of the 3mm layer)...
...and you have this:
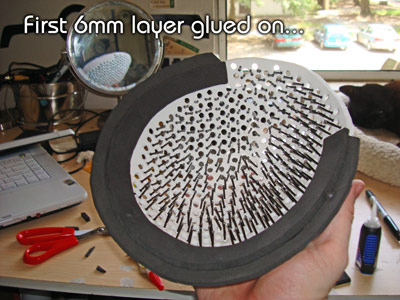
Yes, I trimmed up the edges to make sure it fit. [If for some reason it's too short, you can always stretch it a little!]
Glue and trim the second layer...
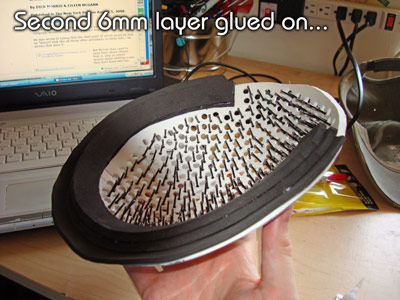
...and finally the third layer!
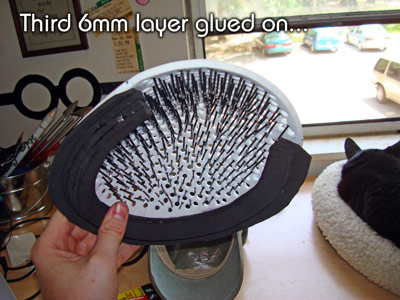
Ok, you'll probably have glue mess everywhere:
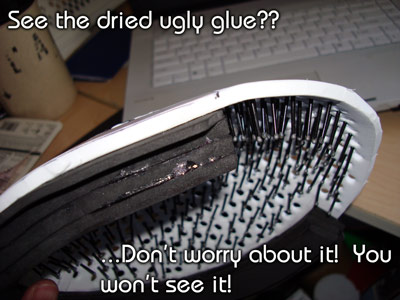
Don't worry, you won't be able to see it! lol... HOWEVER, I want you to notice that squared end. I didn't like this because it was sort of blocking the edges of my temples a little bit. So, what I did was angled the scissors and cut it...

Yes, believe it or not you can do that and it works! So now it looks and functions better, and here's what you have...

Ok, you are DONE with everything having to do with gluing foam! lol...
4) Determine the location of the eyelet holes!
As you see, the top and the bottom 3mm foam for the eyelets match up pretty well:
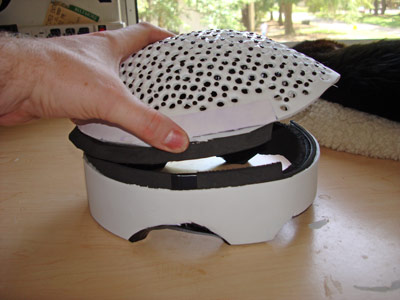
So, if we put the eyelet holes on the top a certain way, then they should match up no problem with the holes on the bottom.
Ok, I said before that I thought TWO eyelet packs from Wal-Mart were necessary, and this holds true here because the best way I could figure to make the eyelet wholes even without putting too much work into it and by simply eyeballing it required 17 pairs! There are only 15 pairs in each eyelet pack. With two packs, you also have extras in case you mess up later putting them in (I messed up on probably 6 or 7! lol...).
Here's how I determined that I needed 17, and don't let this graphic confuse you...
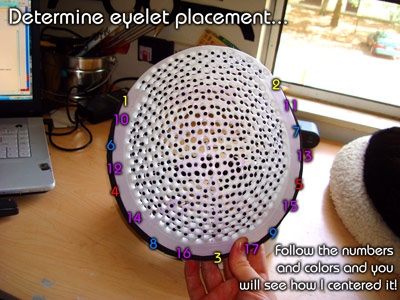
All I did was keep putting eyelet holes in the center of where I put other eyelet holes. Follow the numbers and colors on the graphic above and you'll figure out what I'm talking about. If you can't figure out what I'm doing, then just put them wherever the hell you want to and make sure they line up on the bottom, ok?! It's not a big deal.
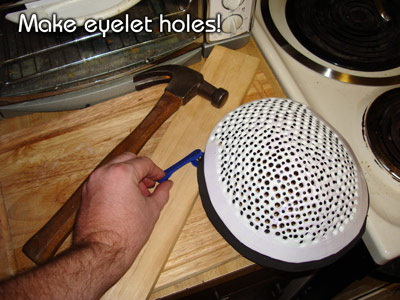
5) Make the eyelet holes!
This step was a little awkward! lol... maybe a drill would have been better, but I didn't use it in the spirit of making this completely "power tool free"! Yep, rig up whatever way necessary to do it like the instructions in the eyelet pack. I started with using the tool provided...
...but I eventually used the hole punch (with whatever size tip that matched up with the tool) because it's a better tool!
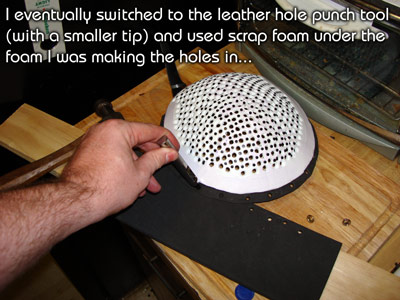
I also went back to using a scrap layer of foam under it. For some reason that seems to work a lot better for me.
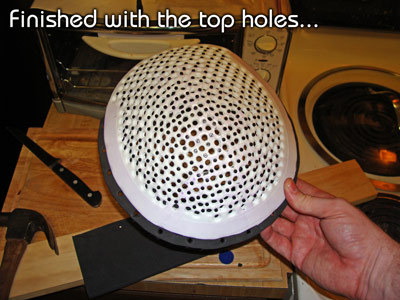
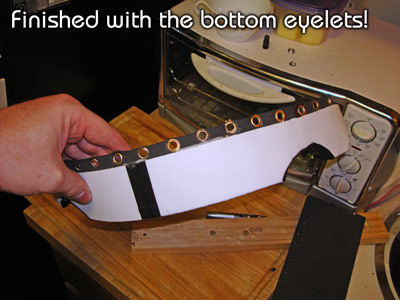
Finally, you are finished with the top:
Do the same thing with the bottom, and figure out whatever way is best for you to make the holes...
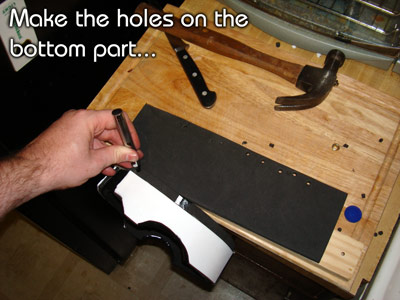
And finally you are through with all of this holes on the bottom part, too:
Like I said, the holes should match up close enough if you are doing it the way I did it.
6) Put the eyelets in the hole and smash them on!
Ok, you will probably mess up a few times on this step because it takes some getting used to! Usually, you CAN get the messed up eyelets out without a problem, but I will admit that I have one eyelet that might have a little Super Glue on it! lol...
A word of advice... you need to hit it HARD with the hammer. The ones that I messed up on I'd say for the most part were because I didn't hit them hard enough! Like I said... you'll get used to it and be a pro in no time! And even if you do find it agonizing and tedious, remember...
You only have to make this once!
Oh, FYI... if you got the eyelet kit like mine, then you will have half brass and half silver eyelets. I just alternated silver/brass/silver/brass etc, and mirrored that pattern on the bottom part as well. This helps you quickly identify which holes match up with each other!
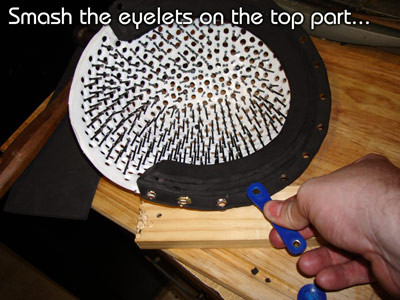
Ok, follow the instructions provided in the eyelet kit, and use the tool and smash the eyelets in on the top:
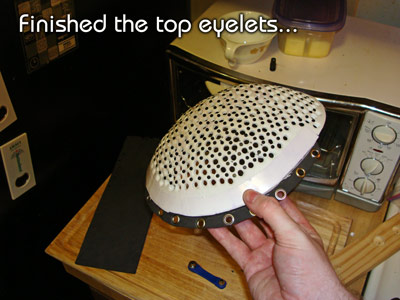
Here's the finished top:
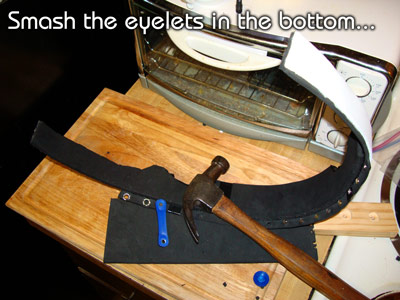
Smash the eyelets in the bottom:
And you are finally finished with the eyelets!
7) LAST PART! WOOHOO!
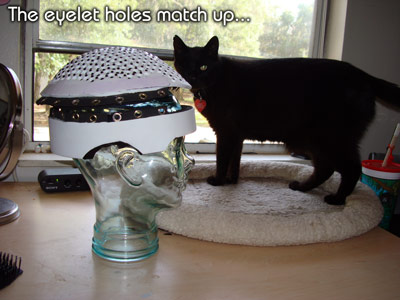
Ok, you can see that the eyelet holes match up pretty well:
So now, we are going to get shoe laces and lace them up! One word of advice -no matter how you lace it- you may want to lace it up in three separate parts with three separate laces -one for each side and the back. This is because it'll be easier to adjust if one side needs a little tweaking! Since I had 17 pairs of holes, I used 6 holes on the left side, six holes on the right side, and five holes on the back.
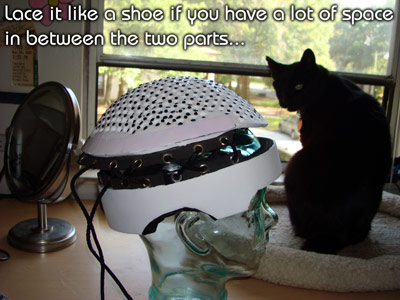
Ok, so lace them up WITH WHATEVER STLYE YOU WANT, and in which ever way will work best for your design!
For instance, if you figure out that you have a lot of space between the two sections, you could lace it up just like a shoe...
If at all possible, though, I wouldn't do it that way. I'd lace it like I did, which makes it so the headband and the top part are "fused together", and adds much more support. I did this by lacing it this way...
I started from six holes back, went through both matching holes, alternated my way to the front...

...turned around and came back..., stopping at the eyelet before the one I started on:
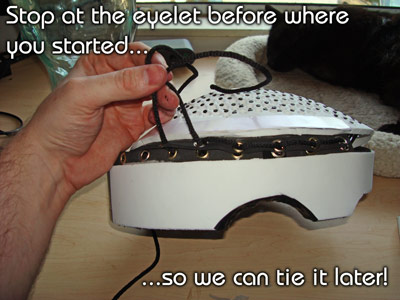
Now we can tie it later!
Lace up the second side...

...and finally lace up the back:
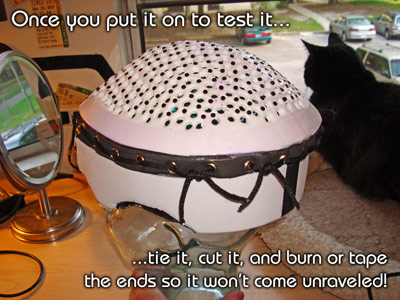
Test it to make sure it fits! Note: mine headband fits slightly higher in the back now, but that doesn't matter. It still gets tight, and the fact that the two parts are now "fused together", it adds a ton of support that I wouldn't have had otherwise.
Ok, if it fits... now, you can tie it, cut it, and burn or tape the ends or whatever so it doesn't unravel!
...AND YOU ARE FINISHED!!!
In the future -maybe even sooner than later- I might make a "Part II - How to determine how many diodes you need and the proper power supply" and a "Part III - How to wire the Laser Messiah". All that stuff is the EASY PART, and it's all over my site how to do it, but I still may take the time to spell it for everyone so there will be NO DOUBT how easy this stuff is!
Now, go forth and multiply [your hair]!
-O.M.G.

The second part of the first step of the instructions that CHANGED THE WORLD of LASER THERAPY --UNDISPUTABLE!!!
.jpg "The World's Greatest Laser Helmet for Hair Loss")
.jpg)
.jpg "EMFs and Laser Helmets")
.jpg "Lasers vs. LEDs -there is no competition!")
.jpg "Calendar of Laser Therapy Usage")
.jpg "Additional Common Coverage Patterns of the Laser Messiah II")
.jpg "PulseDrive Introduction Video")
.jpg "Common diode patterns for the Laser Messiah II")
.jpg "The Laser Messiah II works WORLDWIDE!")
.jpg "The laser helmet for hair loss that changed the world")
.jpg "Fitting Instructions for the Laser Messiah Video Screenshot")
Comments (0)
Login | Register